How to Force 90Hz/120Hz Refresh Rate on Any Phone (2025 Working Guide)
By 2025, many phones ship with high refresh-rate panels but default to conservative behavior to preserve battery life. If you want the consistently smooth UI and lower input latency that higher refresh rates provide, you can often force your device to stay at 90Hz or 120Hz using built-in toggles, Developer Options, ADB commands, or vendor test menus. This guide walks you through safe, reversible methods to test, apply, and—if necessary—revert higher refresh-rate settings without voiding warranties or installing risky apps.
Related: if you notice heat or battery changes after forcing higher rates, consult our Overheating Guide and the Android Speed HUB for optimization tips.
Table of Contents
- 1. Refresh Rate Basics
- 2. Check Device Support
- 3. Developer Options & System Toggles (Safe)
- 4. ADB Method (Reversible)
- 5. Hidden Menus & Diagnostics
- 6. Test Protocol — Measure Impact
- 7. Real-World Example
- 8. Battery, Heat & Troubleshooting
- 9. Vendor Quick Notes
- 10. Final Recommendations
1. Refresh Rate Basics
Refresh rate (Hz) is how often the display redraws each second. Higher rates (90Hz, 120Hz, 144Hz) improve perceived smoothness and reduce input latency. However, they also increase power draw when used continuously. Modern phones balance these concerns with adaptive refresh strategies; forcing a static higher rate trades battery life for consistently smoother motion.
2. Check Device Support
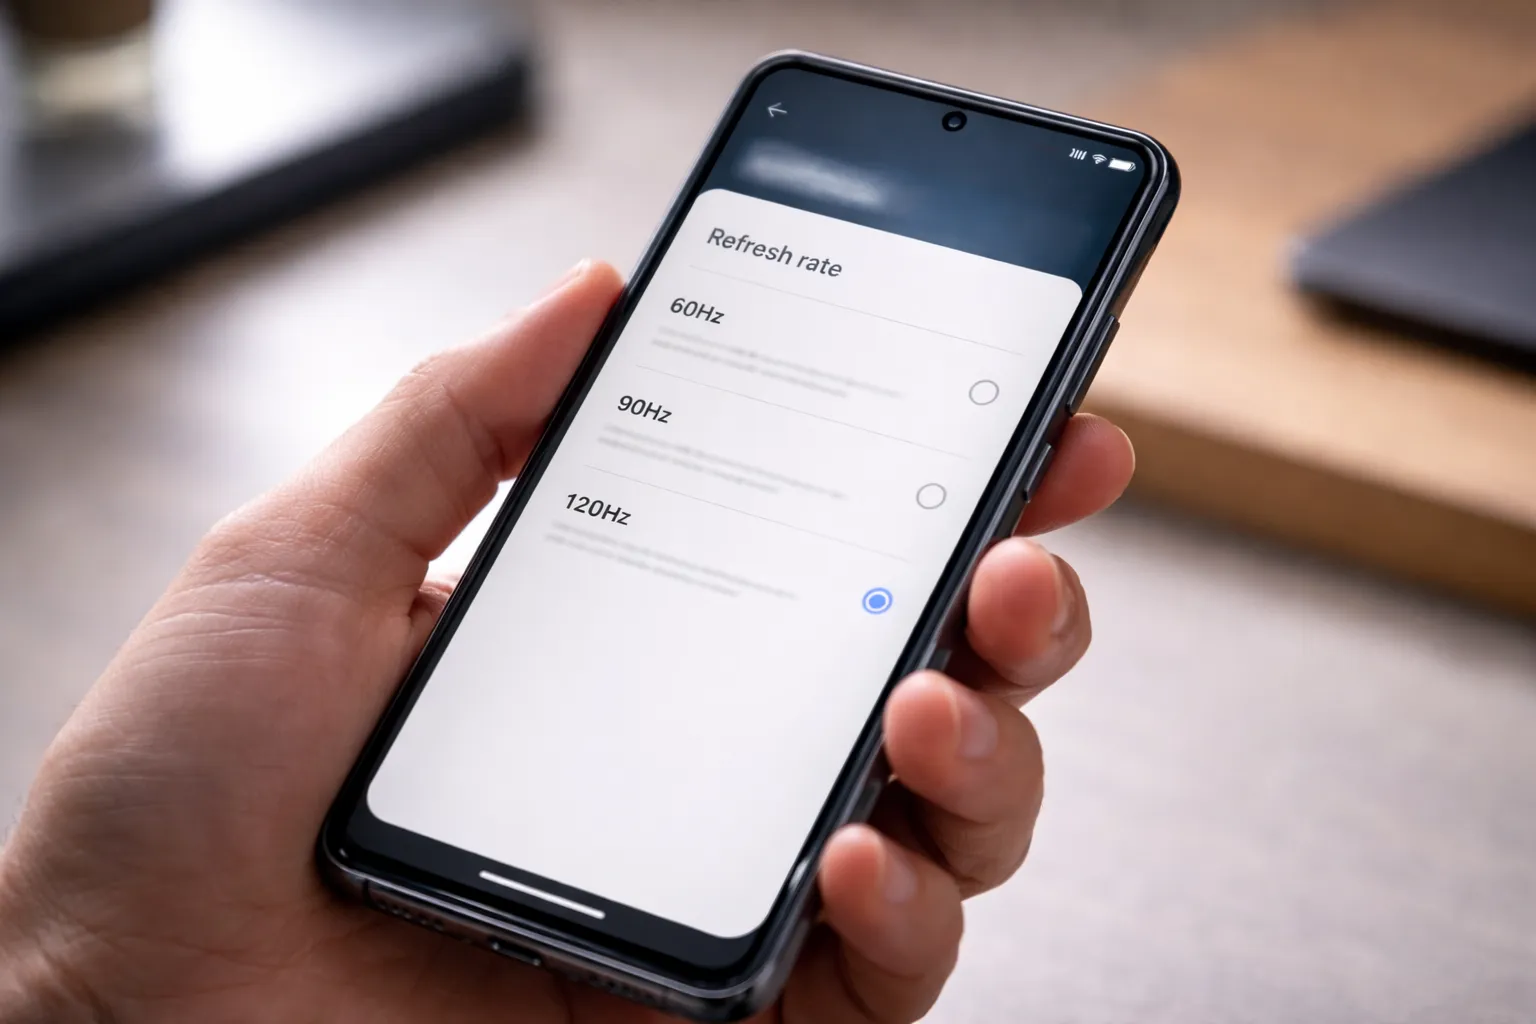
Start by checking the settings UI and developer overlay:
- Settings → Display → Refresh rate or Motion Smoothness. If 90/120/144Hz options are present, your panel supports them.
- Developer options → enable Show refresh rate to see real-time Hz reported on screen.
- If the UI lacks options, the display may still support higher rates — proceed to the ADB diagnostics below to inspect available modes.
3. Developer Options & System Toggles (Safe)
Use the safe, in‑OS options first. These are reversible and unlikely to cause issues.
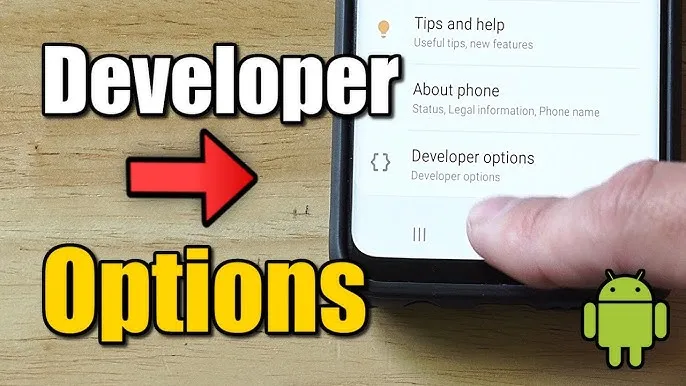
Enable Developer Options
- Settings → About phone → tap Build number seven times.
- Back to Settings → System → Developer options.
Useful Toggles
- Show refresh rate — visual overlay to verify changes.
- Force peak refresh rate — available on some ROMs (locks to the highest panel rate).
- Disable refresh throttling — on some OEMs this prevents dynamic downclocking.
These toggles are safe and reversible. If your OEM exposes a direct refresh-rate choice in Settings → Display, prefer that option.
4. ADB Method — Safe, Scriptable, Reversible

ADB gives you a reliable, repeatable way to force refresh rates by writing system settings. Use the following process and check behavior after each change.
Requirements
- PC with Android Platform Tools (ADB)
- USB cable and USB Debugging enabled
Read-only checks first (safe)
adb devices
adb shell dumpsys display | grep -i "refresh\|mode"
Inspect available modes and the active refresh rate. This helps confirm what the system reports before any change.
Force a specific rate (example: 120Hz)
adb shell settings put system peak_refresh_rate 120
adb shell settings put system min_refresh_rate 120
To revert to OEM defaults:
adb shell settings delete system peak_refresh_rate
adb shell settings delete system min_refresh_rate
Tips:
- Use integer values (90, 120); some builds tolerate decimal inputs but integers are widely supported.
- After applying, toggle the screen off/on or reboot the device to ensure the change is applied in all apps.
- If no change appears, the OEM ROM may ignore the keys — try vendor diagnostics (next section) or search for OEM-specific keys.
5. Hidden Menus & Diagnostic Tools (OEM Specific)
Service or engineering menus may provide display tests and mode information. These are helpful for diagnostics but avoid changing unknown parameters unless documented.
- Samsung: Dial
*#0*#for the hardware test menu (display, color tests). - Xiaomi/Redmi: EngineerMode / Service Menu exposes panel tests.
- OnePlus / Oppo / Realme: Similar service menus exist for panel diagnostics.
Use these menus to confirm the panel modes and validate changes made by ADB or developer toggles.
6. Short Test Protocol — Smoothness vs Battery
Run this 15–30 minute test to measure practical trade-offs:
- Enable Show refresh rate overlay.
- Baseline (10 min): scroll social feed steadily for 5 minutes, play a 5-minute video, and a 2–3 minute game round; note the overlay behavior and battery % change over the run.
- Apply forced refresh rate (ADB or developer toggle) and reboot if prompted.
- Repeat the same activities and compare: sustained refresh value, frame drops, battery delta %, and surface temperature changes.
Record basic outcomes (overlay remains at forced Hz, battery change within acceptable range, no visual glitches) and keep the setting if results match your priorities.
7. Real-World Examples — 5 Case Studies
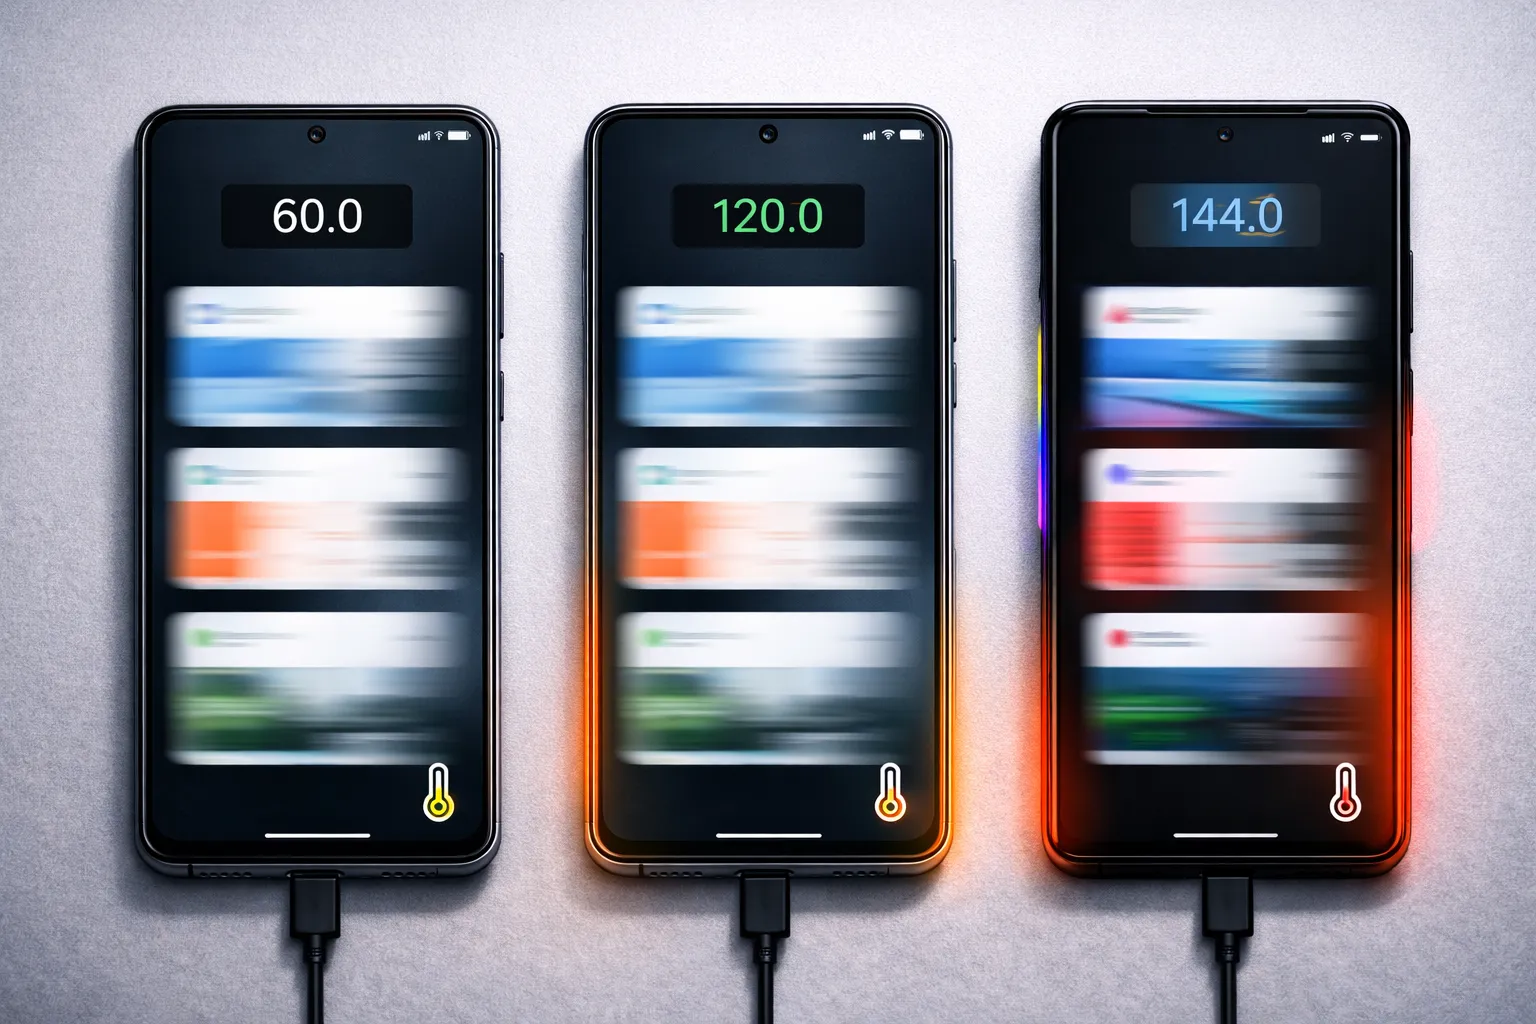
Below are five representative, repeatable case studies showing typical outcomes when forcing higher refresh rates across device classes. Each case lists the short test conditions, measured KPIs (sustainedHz, battery Δ% over the run, average and peak surface temps, and observed frame drops), and a short dumpsys excerpt illustrating how the device reports its mode.
Case A — Mid-range 90Hz (Daily Use)
Context: mid-range phone with an advertised 90Hz panel that often fell back to 60Hz during light browsing and social feed scrolling. Test run: 15 minutes total (5 min scrolling, 5 min video, 5 min casual UI navigation).
- Before (adaptive): sustainedHz: 60 (drops common), battery Δ: -3% (15m), avg surface temp: 33°C, peak: 35°C, frame drops: occasional microstutters.
- After (forced 90Hz): sustainedHz: 90, battery Δ: -4% (15m), avg temp: 34°C, peak: 36–37°C, frame drops: rare; perceived smoothness improved noticeably.
# read-only sample
adb shell dumpsys display | sed -n '1,80p'
# ... activeMode: 90
# ... availableModes: [60,90]
# ... currentRefreshRate: 90
Notes: Small battery and temperature cost for a clear UX win; recommended for users who prioritize smoothness.
Case B — Flagship 120Hz Adaptive (Balanced)
Context: flagship device with adaptive 60↔120Hz switching depending on content and power state. Test run: 30 minutes (scrolling-heavy + 10-minute gaming burst).
- Before (adaptive): observed variable Hz (60–120), battery Δ: -2.5% (15m baseline), avg temp: 34°C, peak: 38°C, frame drops: none.
- After (forced 120Hz): sustainedHz: 120, battery Δ: -5% (15m segments), avg temp: 36–37°C, peak: 40–42°C under gaming; frame drops: none but thermal headroom reduced.
# read-only sample
adb shell dumpsys display | grep -i refresh -n
# peak_refresh_rate: 120
# min_refresh_rate: 60
# active refresh: 120 (post-change)
Notes: Flagships usually have better thermal management; forcing 120Hz gives a strong smoothness gain at a moderate battery & heat cost — suitable if you accept shorter screen-on time or prefer performance modes.
Case C — Gaming Phone 144Hz (High-Intensity)
Context: a handset designed for gaming with a 144Hz panel and specialized cooling. Test run: 20–30 minutes of continuous competitive gaming.
- Before (game mode): sustainedHz: 144 (within games), battery Δ: -7% (20m), avg temp: 38–40°C, peak: 44–46°C, frame drops: rare when thermal headroom is present.
- After (force system-wide 144Hz): sustainedHz: 144 across UI and apps, battery Δ: -9% (20m), avg temp: 40–42°C, peak: 47–49°C, occasional thermal throttling if ambient temp is high.
# read-only sample
adb shell dumpsys display | sed -n '10,40p'
# mCurrentRefreshRate: 144.0
# mode list: [60,90,120,144]
# game-mode: enabled
Notes: Gaming phones tolerate higher sustained rates better, but expect faster battery drain and higher surface temps; use forced high rates only if cooling and battery performance are acceptable.
Case D — Pixel-style Adaptive (Thermal Throttle Example)
Context: A Pixel/AOSP device with aggressive thermal policies that prioritize longevity and may throttle sustained high rates under load. Test run: 40 minutes mixed (video + game + background sync).
- Before (adaptive): adaptive 60–120Hz, battery Δ: -3% (15m), avg temp: 33–35°C, peak: 39°C, no long-term thermal events.
- After (forced 120Hz): initially sustained at 120Hz, but after ~18–25 minutes the system engaged thermal mitigation: sustainedHz dropped, CPU/GPU clocks reduced; battery Δ: -6% (15m after throttle), peak temp: 45–48°C, frame drops and judder increased once thermal mitigation triggered.
# thermal read-only excerpt
adb shell dumpsys thermalservice | sed -n '1,40p'
# sensor: skin_temp: 44.2 C
# thermal status: throttling=1
Notes: Devices with aggressive thermal management may revert gains by throttling; monitor thermal service and prefer short trial runs rather than long forced periods if heat is a concern.
Case E — OEM-Locked / No-Effect Case
Context: some OEM builds ignore the system keys or enforce policy that prevents persistent changes via settings keys. Test: attempted ADB changes but no observed effect.
- Attempted change: settings put system peak_refresh_rate 120 / min_refresh_rate 120
- Observed: dumpsys display still reports active 60Hz; device logs show the keys are ignored or reset on policy check.
# read-only sample
adb shell dumpsys display | grep -i refresh
# currentRefreshRate: 60
# availableModes: [60,90]
# note: settings keys ignored by ROM
Notes: When changes have no effect, focus on vendor debugging menus, updated firmware, or wait for an OEM update; do not attempt kernel flashing unless you accept warranty and stability risks.
Summary & Practical Takeaways: these case studies show predictable patterns: mid-range phones give the best UX/perf trade-off for casual users when forced cautiously; flagships and gaming phones offer larger gains but at measurable thermal/battery cost; Pixel-style devices may employ thermal mitigation that reduces long-term benefits; and some OEMs simply ignore system keys. Use short, scripted tests (see Test Protocol) and monitor KPI values before deciding whether to keep a forced rate for daily use.
8. Trade-offs, Troubleshooting & Safety

Potential issues:
- No effect: OEM ignores keys — check for vendor-specific settings or updated firmware.
- Visual artifacts: delete the keys and reboot to revert.
- Battery and heat: higher rates increase power draw; revert if you see substantial thermal rise or instability.
Warranty note: changing system settings via ADB is generally safe; avoid flashing custom kernels or making low-level kernel changes unless you understand the risk and warranty consequences.
9. Vendor Quick Notes
- Samsung (One UI): Settings → Display → Motion smoothness. Use the service menu for panel diagnostics if needed.
- Xiaomi / MIUI: Settings → Display → Refresh rate. Engineer Mode can show additional panel modes.
- OnePlus / OPPO / Realme: Smooth display toggles exist; developer options sometimes provide more control.
- Pixel / AOSP: Adaptive refresh is robust; ADB keys may work depending on build.
10. Final Recommendations
For most users, test forced refresh rates for short periods first. Use Developer Options and read-only ADB diagnostics to verify behavior; apply permanent ADB settings only if the gain in smoothness matches the additional battery/thermal cost. If you run into issues, revert the settings and consult vendor support. For thermal and battery tuning, pair this with the Overheating Guide and our optimization resources in the Android Speed HUB.